
You can find out how to create an interface to your external databases here.
Before you can import data from your previous systems, you have to create an import template. In this you specify which data should be transferred and which fields are required. So you don't have to import all fields of your import file.
That's how it works:
We'll show you the complete import process here.
1. Go to the Import/Export menu
2. Click on the Objects tab and then on File Format
3. Click the Create button
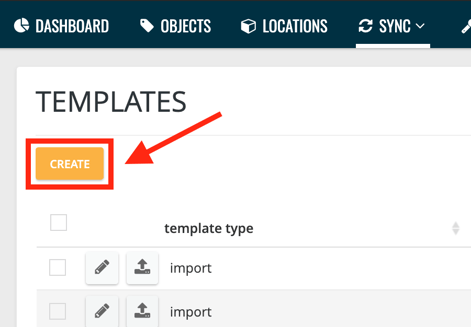
4. Choose Import
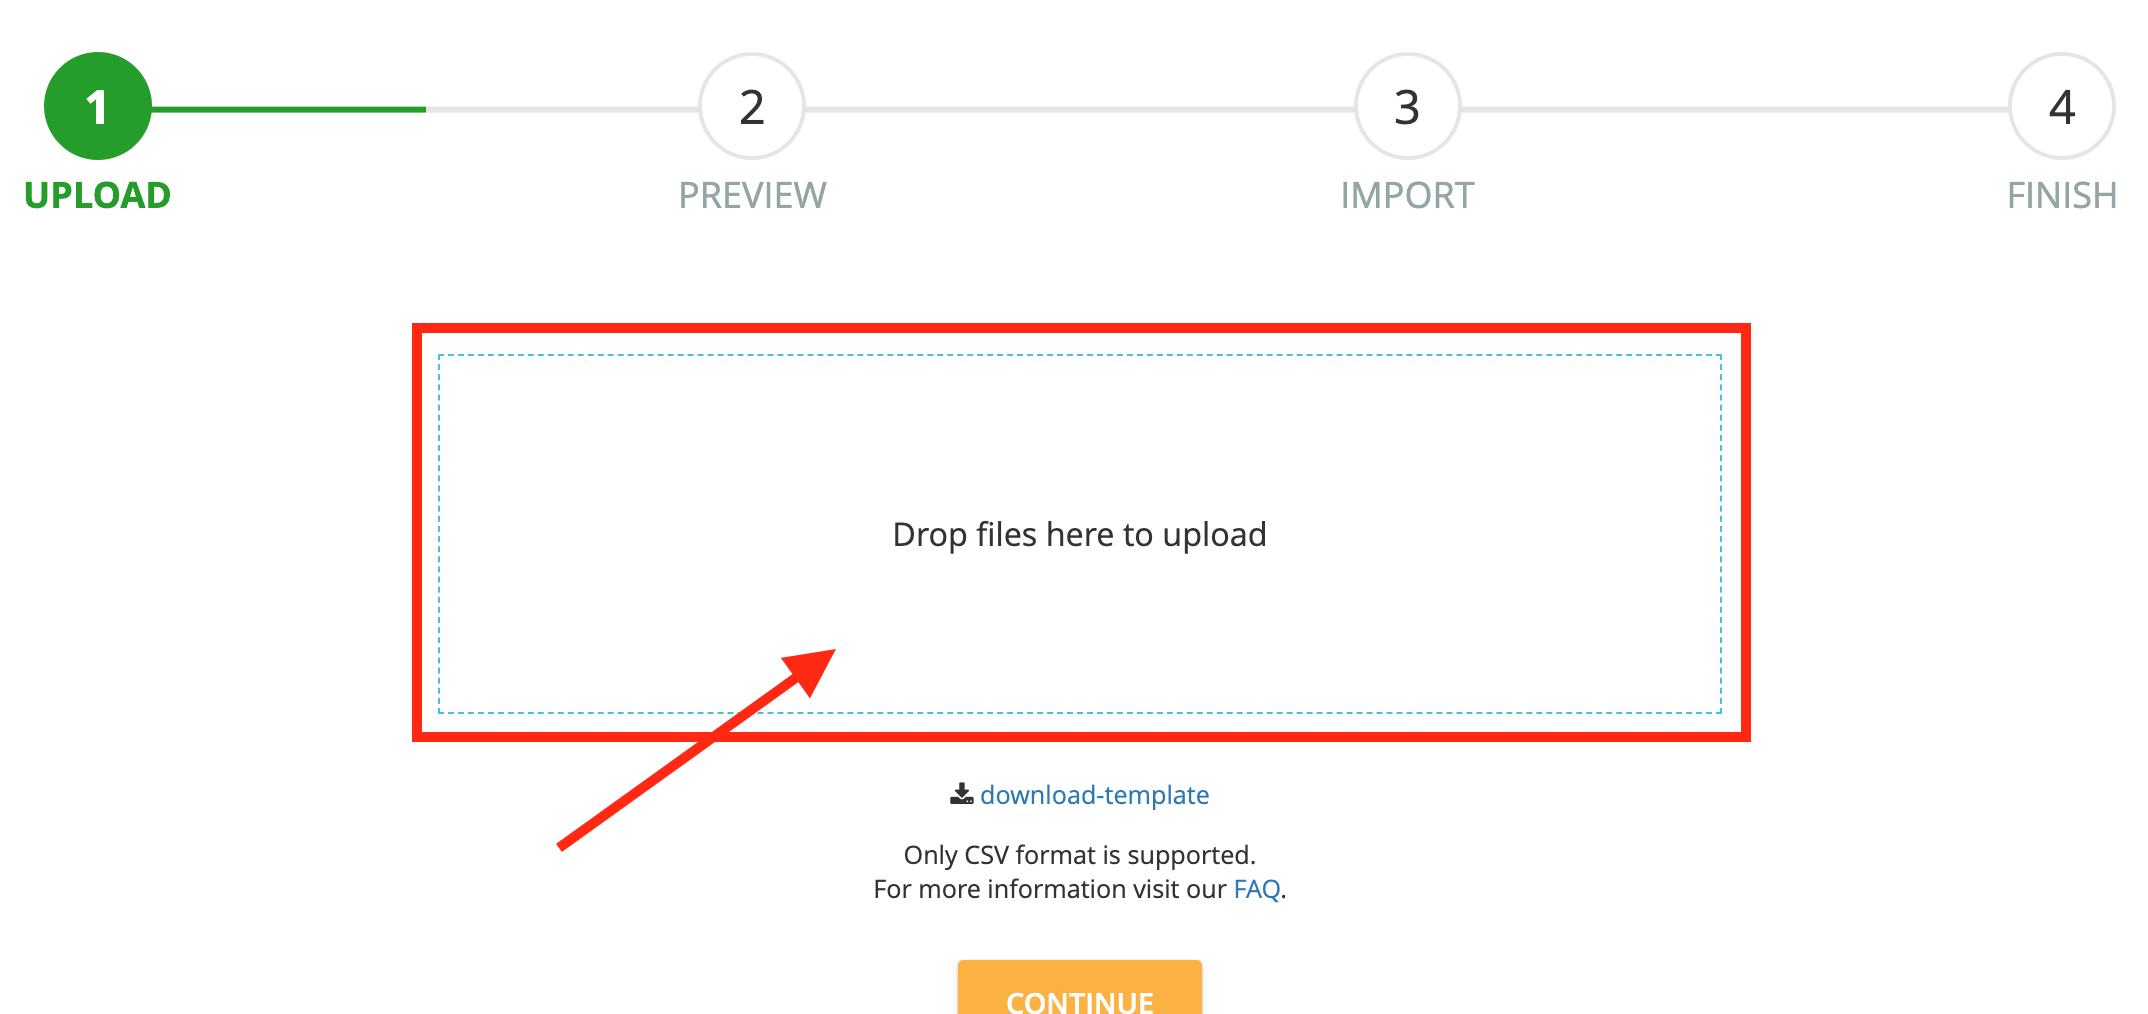
5. Drag and drop your template file into the window (see below) or click in the window and select the template file, then click on Continue
Note that the template file must be in .csv format so that there are no complications or misrepresentations in the upload.
6. Select your options in the preview and give the template a name
You can set whether the template should use the first line as a heading, which separator should be used and whether empty fields in the template should overwrite existing fields.
7. When mapping, assign all seventhings fields to the corresponding fields in the import file. To do this, drag the seventhings fields on the left to the corresponding position in the middle.
Note that you cannot create new fields here. So make sure in advance that you have already created all the fields to be imported in the inventory manager.
You can remove fields from the import file using the cross if you do not want to import them.
Note that you only drag the identical field types (text, number, date, ...) next to each other. If the field type of an import field is incorrect, you can set the category manually. To do this, simply double-click on the field.
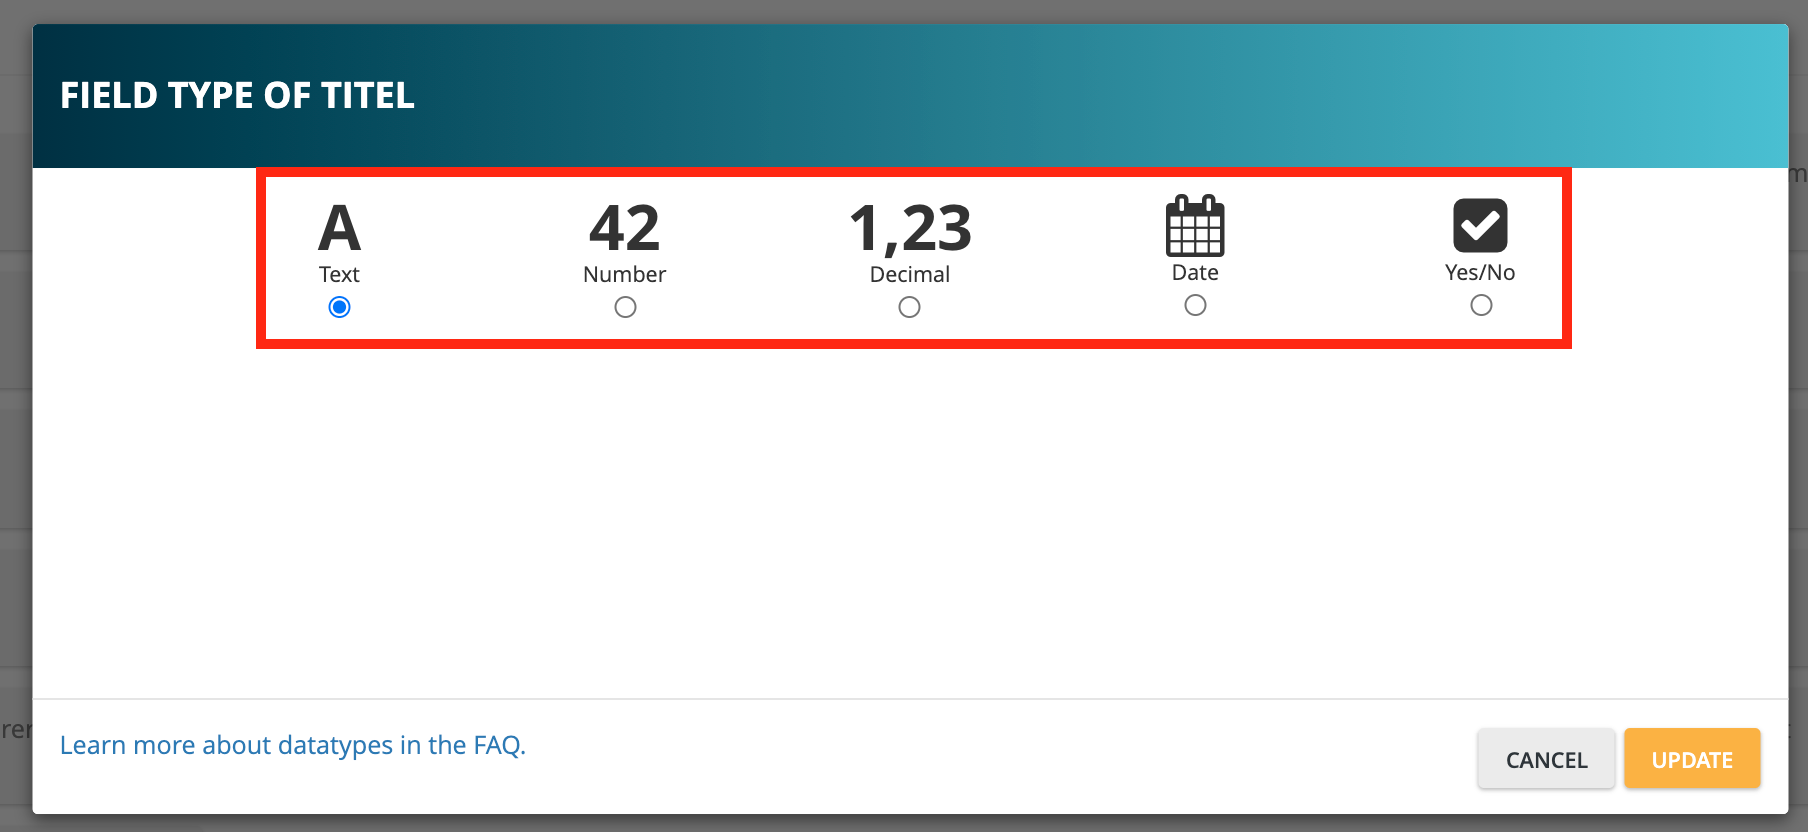
Select the appropriate field type here.
8. Select a key field
Note: The key field is used to uniquely assign the import fields to the seventhings fields. It makes sense to select the scan code or the system number here, as this is usually only assigned once.
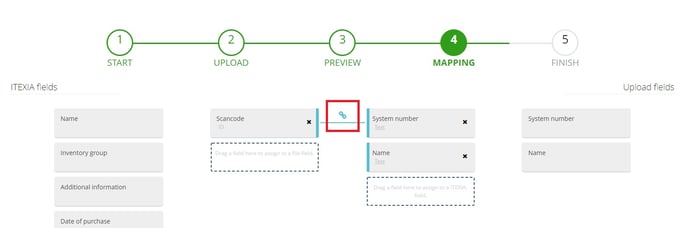
Note: In the example above, the key field is placed between the scan code and the system number. This is the case if:
You already use your own labels with your own number, e.g. your asset number and a .csv file with your inventory data to seventhings. Then you have to drag the scan code (field in seventhings) next to the asset number field (or whatever you name your unique number from your import file) when mapping, so that it is clear during the scan that a certain inventory belongs to this number
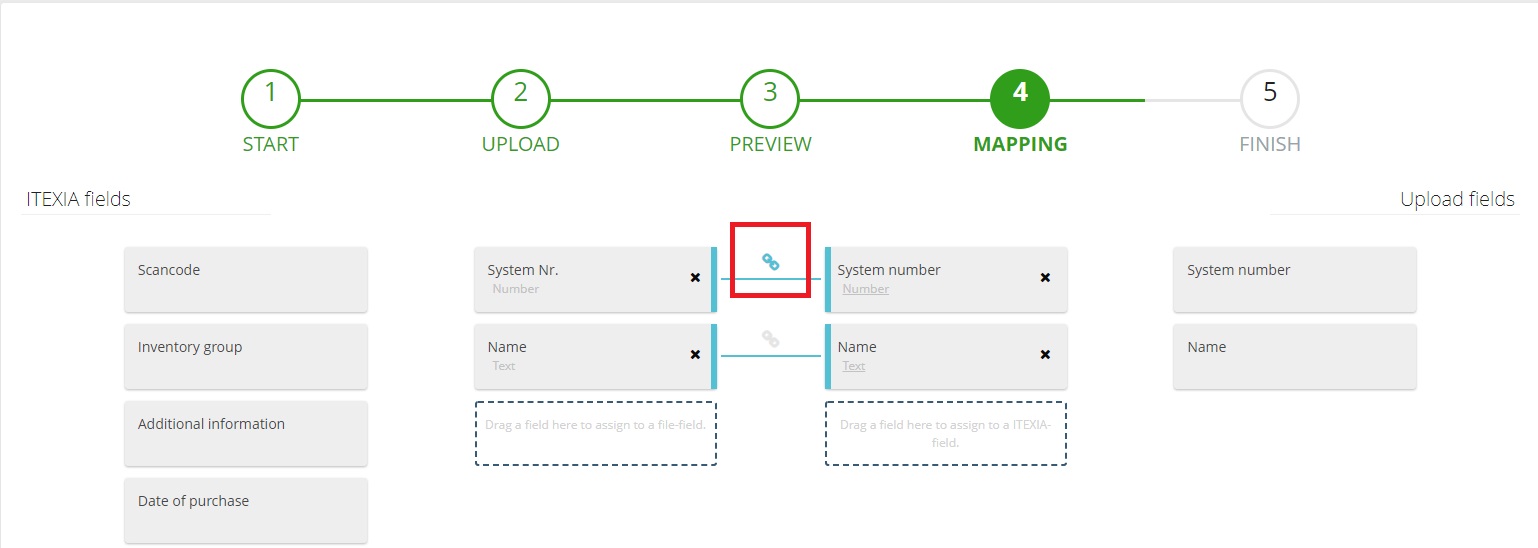
In this example, the key field is set between system no. and system number
This is the case:
- When you re-label with our labels then, before creating the import template, create a new field "system number" into which the unique number from your data record to be imported (e.g. the system no., Datev no. Or SAP no.) Is to be imported.
You do not need to pay attention to the Scancode field in this case. You only add the scan code to the system numbers during your inventory.
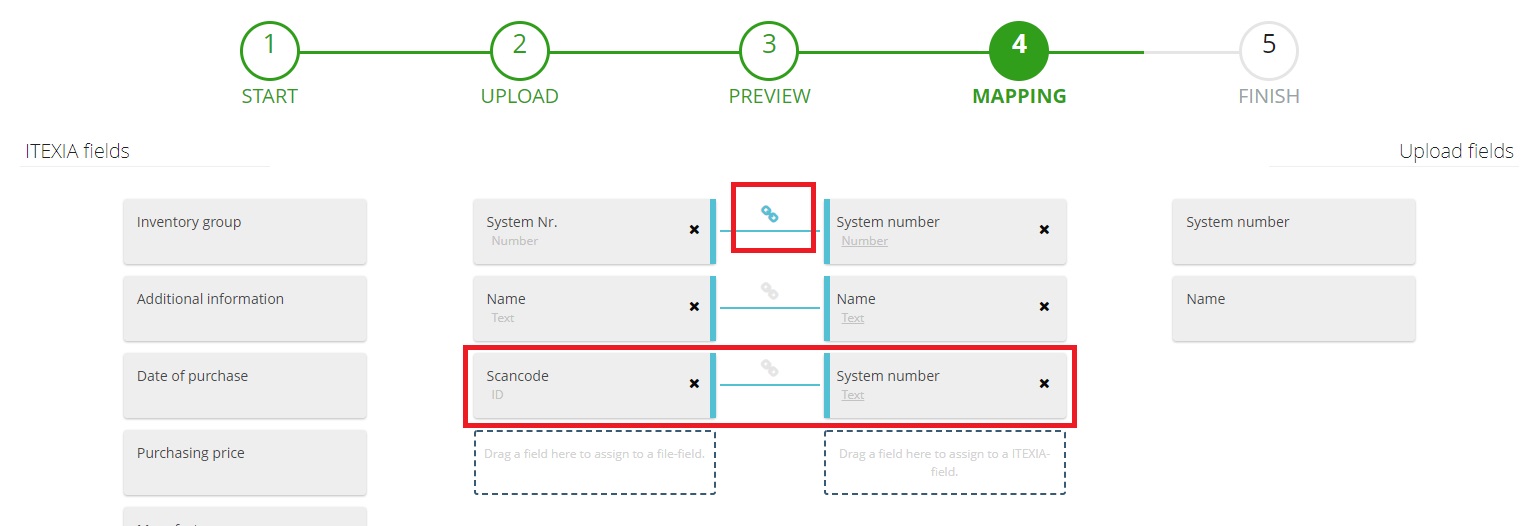
Tip:
- We still recommend you to map the scancode and not to leave it "empty".
- For example, use the system number again and simply drag it next to the Scancode field.
Make sure that the system number doen't have the same number of digits as the scancode, otherwise there may be confusion.
When scanning, you can then simply overwrite the system number, which is in the "Scancode" field, with the scancode written on the label.
Please also note that the import overwrites all existing fields (including those that you have defined as "Not editable" in the field definitions as well as the data from deleted or blocked inventories).
So if you don't wish to overwrite a field during import, make sure not to drag this field into the middle when mapping.
9. Confirm your entries with Finish
We have summarized all of this for you in a video tutorial on importing object lists: